Showing posts with label nibbles. Show all posts

15 April 2011

Pâtisserie, Mais Oui!

I have told you previously about my love of pie crusts. It's kind of like eating fried food--it's always good, no matter what it is. Think about it. Fried pickles, yes. Fried oysters, yes. Fried chicken, hell yes. Now, try it with pie crust. Irish boxty, yum. Pie of pretty much any flavor under the sun, yum. Chicken pot pie, yum yum.

Pâtisserie is just a fancy French way of saying pastry, and so much fun to say! Say it with me, "Pâtisserie..." Yeah, it even sounds delicious. Unlike their fruit-filled sugar-glazed counterparts, these pâtisseries are savory and work well as an hors d'oeuvre or as part of a tasty meal.
Red Pepper Rosemary Pâtisseries
--4-5 small sweet peppers (I used the small sweet bell peppers Costco sells)
--1 refrigerated pie crust dough
--4 oz. brie cheese
--1 TSP + 1 TBSP unsalted butter
--1 small shallot, diced
--fresh rosemary


Take the peppers and place them directly onto the oven rack. Roast at 350 degrees for 15 minutes, turning once. Let cool before removing tops and slicing in half.
.Roll out the pie crust and cut it into 6 squares. Wrap 6 equal-sized pieces of brie in the pie crust, making packages. Bake in the oven at 350 degrees until pie crust is golden, brushing occasionally with 1 TSP melted butter.
While the pastry cooks, melt the 1 TBSP butter in a large skillet. Sauté the shallot and fresh rosemary until the shallot is softened and begins to brown. Add the sliced roasted peppers and sauté until tender.
Remove the pastries from the oven and pour the pepper mixture into the pan. Brush the pâtisseries with any remaining butter and return to the oven for 5 minutes. Serve the pâtisseries over the sweet pepper mix.
Dammit Jim, I'm a cook, not a doctor...
Time: 35 minutes
Serves: 6 Pâtisseries
Calories: 251 per Pâtisserie

18 February 2011

Nibble on Dates on Your Next Date

So, I hosted a party recently, you know, like you do. Perhaps you read about it the other day? Hmm? Well, you'll be shocked to know that I made more than one thing for the party. I know, crazy talk.

So here's another delicious (and time-friendly) appetizer you can serve at your next party, dinner gathering, hot date, picnic... Yes, picnic. Because after weeks of sub-zero temps in Denver, mother nature has magically bestowed 60-degree days upon the Queen City of the Plains. And if you have dates(the fruit), and it's warm where you are, you could be eating these on your porch or in the park twenty minutes from now.

Also, did you know that many believe that dates (the fruit) are an aphrodisiac? So if you want something to nibble on for your next date (not the fruit) maybe try a date (the fruit).
You'll notice I didn't include quantities below because the recipe is pretty much the same whether you make five or fifty. The typical goat cheese log is 8 ounces. I made thirty of these for the party and still had plenty of goat cheese left--just remember that a little goes a long way. Also, I'll stop making "date-the-fruit" jokes and just get on with the show!

Goat Cheese & Almond Stuffed Dates
--Dates, sliced open lengthwise (but not all the way through), pits removed
--Goat cheese, plain
--Almonds, whole and raw (sometimes labeled "natural")
--Crushed red pepper
--Black pepper, fresh
--Prosciutto, torn into thin slices [obviously, omit this if you wish to make it vegetarian]


Using a small spoon, fill each date with a scoop of goat cheese. Then place an almond inside, nestled in the goat cheese. Last time I made these (at Easter), I sprinkled the goat cheese ahead of time with the crushed red pepper and fresh black pepper. This time I just sprinkled the dates with the spices, then wrapped each date with a prosciutto slice and sprinkled them again.

Bake at 400 degrees for 12 minutes until the goat cheese is warm, but not scalding. Serve warm. You can also make these the night before or morning of and then just heat and serve.


Dammit Jim, I'm a cook, not a doctor...
Time: 20 minutes
Calories: 84 calories per date

16 February 2011

Party Hardy Rock n' Roll

I would like to take you all into the way-back machine. You'll be shocked to know (yeah right) that I come from a long line of ladies who can boss around a kitchen and are famous for their mad party-throwing skills. Imagine, if you will, the tiny future bacon princess (that's me!) running underfoot, dragging a chair to the counter so I can watch my mama, hard at work making one of her famous party dishes. For a time, my parents even ran their own catering company. Cookin' and eatin' you see is in my DNA!

One of the staples that kitchen boss Mom would make was her crab-stuffed mushrooms. She would stuff hundreds of little fungi caps and send them out to the starving masses only to have the plate return, empty, moments later. So, clearly, it's one of my go-to party platters as well.

Recently I had the honor of hosting a baby shower for my former partner, Kathryn. In the spirit of a divide-and-conquer approach, each of us opened our arsenal of crowd-pleasers (because people, you never ever argue with a pregnant woman with knife skills when she says she wants to cook things too!). So here you go, Mom's famous crab stuffed mushrooms, just for you!
Crab Stuffed Mushrooms
--1 lb. mushrooms (about 3 dozen), washed and dried, stems removed
--4 TBSP butter
--1/4 cup finely chopped green onions
--garlic, finely minced
--1 1/2 cups bread crumbs, finely minced
--1 TBSP Worcestershire
--salt and black pepper
--shredded mozzarella (no more than 1 cup)
--2 cans lump white crab meat, drained, rinsed, and minced

Take the mushroom stems and finely chop enough stems to measure about 1/2 cup. Melt 3 TBSP of the butter in a large skillet or frying pan (the one I used had deep sides to allow me to stir the mixture without slopping over the sides). Stir in the chopped mushroom stems, garlic, and green onion, and cook over medium heat for 5 minutes, stirring regularly.

Remove the pan from the heat and stir in the breadcrumbs, Worcestershire, a pinch of salt, a few turns of cracked black pepper, and the crab meat.
Melt the remaining 1 TBSP butter in a shallow baking pan. Fill the mushroom caps with the stuffing mixture. Place them filled side up in the baking pan and sprinkle them with the cheese. Bake for 15 minutes at 350 degrees, then turn the broil setting on and broil them for 1-2 minutes to brown the tops. These are best served warm. You can prep them and stuff them the day before or earlier in the day and then sprinkle with cheese and bake when you are ready to serve.
Bonus: Here I am enjoying all the treats from the party. Cheers!
Dammit Jim, I'm a cook, not a doctor...
Time: 45 minutes
Serves: About 36 mushrooms
Calories: About 47 per mushroom

20 January 2011

Sustainability: Is Going Green Where It's At?

Sustainability. Slow food. Carbon footprints. Local food. Fair trade. These are hot topics currently in the culture at large and the buzzwords du jour of the food community. And with good reason.

People care more and more about where their food is coming from. In 2009, Merriam-Webster added the word "locavore" to their dictionaries, thus solidifying the farmer-fed movement that cuisine pioneer Alice Waters has been advocating since 1971 (when she opened the quintessential sustainable restaurant, Chez Panisse).

If you ask a kid where their food comes from many may say "the store." But ask "Where does the store get it from?" and the same child will likely look back at you quizzically. Celebrity chefs like Waters and Jamie Oliver hope to change this by teaming up with schools to promote teaching kids about food sources. Waters' foundation helps a California middle school's students to farm and cook the food they grow. Oliver's Food Revolution is all about changing school lunch programs to promote better nutrition as well as food education. And the White House, with First Lady Michelle Obama as their spokesperson, has launched Let's Move with the goal of raising a healthier generation of kids.

Do a Google search for "sustainable restaurants US" and you will end up with 6 million returned results. Websites like Local Harvest, Organic Highways, and Eat Well Guide allow travelers and locals alike to find restaurants by location or keyword search that assert themselves to be organic or farmer supplied and the like. It's not just so-called "hippies" who are thinking local, organic, or natural. Whole Foods Markets boasts stores in 38 U.S. states as well as the U.K. and Canada. Whole Foods also has their Local Producer Loan Program investing in small, local products and their producers.

In Denver--where I live--restaurants build culinary clout by not only sourcing food locally (and changing their menus seasonally as a result), but also in managing their own farms like Alex Seidel's Fruition. Similar places exist in metropolitan areas large and small in Virgina (Alexandria, Roanoke), Indiana (Terra Haute), Georgia (Summerville), Alabama (Birmingham), Texas (San Marcos), Missouri (Springfield), among others. Talk about a revolution--local found is in abundance!

So what will the next trend among savvy restaurateurs be? My money is on the fully sustainable restaurant. If sourcing or growing your own local food isn't enough for diners (or owners or chefs), then build restaurants out of recycled materials, use all items and generate zero waste, offset carbon footprints, the sky's the limit! I found this TED talk from London restauranteur and chef Arthur Potts Dawson, whose Acorn House and Water House restaurants feature gardens, compost, non-fossil fuels, and other green elements.
 
So is sustainable food just a trend? Will it soon be passé, like Asian-fusion or tapas, glutting the market with so much supply that demand will wane? Perhaps, but I somehow doubt it will disappear into obscurity. Because unlike other food trends there is more romance in local food. Exotic and global cuisines are enchanting, to be sure, but nothing pulls at the heartstrings of diners like the quaint idea that one is eating something in the same fashion his or her great-grandparents might have enjoyed.

22 November 2010

Bon Anniversaire Bacon & Other Bad Habits!

Logo courtesy of Simply Fabulous
Gosh, has it really been a year? And yet, simultaneously, has it only been a year?

It's hard to believe that it was over a year ago when I was making bacon toffee cookie bars in my kitchen and had the epiphany moment. I decided then, fingers covered in dough, house smelling of pork products, that I wanted to write a cookbook. But as a home cook I didn't know the first thing about writing a cookbook. I'm no chef, just some girl who likes to make food things who grew up in a household with people who like to make food things, who descended from a long line of people who like to make food things.

So I decided to write a blog to first whip both my brain and my kitchen into thinking outside of the recipe box. I woke up in the middle of the night with the thought that this all had to happen NOW, bought the URL at 2am and registered both the Blogger and Wordpress user-names. My friend Kathryn, a classically trained chef, was unemployed at the time and offered her partnership services. And thus, Bacon & Other Bad Habits was born.
Photo of Kathryn and Leah courtesy of Kokoro Photography
In the past year many things have changed. I've been trying to get into better shape and so my cooking has taken on a new approach of how to eat healthy but not give up on taste or things I like to eat. I hope I've succeeded in this. I've forced myself to branch out from standards and family favorites and figure out how to cook new ingredients and use new preparations for everyday items. I started getting my vegetables from a farm to help challenge me and introduce me to new produce.

But other things have changed too. Kathryn started teaching at a culinary school and working as a personal chef and had less time to devote to my pet project. As such, she stopped blogging in February. She is also almost eight months pregnant as I write this; a delightful new critter is about to enter her world. I am very proud of my friend and former contributor and happy that her pushing and partnership are why this blog exists to begin with. I'm equally happy that she now has a pet project of her own--a baby!

My own life is on a new adventure as well. I'm slowly moving out of my tiny 400-square-foot dollhouse (take the tour on YouTube and check out my old super awesome asymmetrical haircut. I was so rad.) and into my boyfriend's house. The kitchen is bigger, the lighting is worse. Here's hoping I become a better photographer...

Thanks for reading Bacon & Other Bad Habits. For "liking" it on Facebook. For re-tweeting the tweets. And more importantly, for telling your friends and family about the site. And for cooking the recipes and providing so much excellent feedback about what you want to see more of.

Now, if I only had time to focus on that cookbook...I suppose that's all in due time, all in due time. Happy birthday Bacon & Other Bad Habits, here's to another great year!

xo,
L.
Photo of Leah courtesy of Kokoro Photography

25 October 2010

Pita Pear Pizzas

If we're lucky, we'll still have some delicious pears for a few more weeks. Pears, like grapes, do best in wine country climates like the Pacific Northwest (or the Western Slope in Colorado), where the combination of hot-cold and wet-dry work together to create supple sweet luscious fruits. Beyond being eaten plain--like an apple--pears work well in hearty salads, warmed as a compote, or baked and softened as a side or dessert.


Or, in our case, on a pita bread pizza! When my friend Cha-Cha and I get together it usually means business. But as two busy girls on the go, we were both exhausted from our respective workdays and wanted something healthy and filling to mow down on as we sunk into the couch to become zombies in the warm glow of the television. Cue the pizza idea--and one that works well with kids or adults alike because of the versatility. When making a mini-pizza you can make it anything you want. I of course, had to make ours a little fancy...just like us.

Pear Pita Pizzas
--2 round whole wheat pitas
--2 TBSP tomato paste
--1/4 cup grated cheese (mozzarella or a pizza/Italian blend)
--2 pieces of bacon
--sliced mushrooms
--1 pear, sliced or chopped into chunks
--fresh spinach leaves
--crushed red pepper
--2 TBSP feta crumbles
--balsamic vinegar
--olive oil
--black pepper


Place the pitas on a cookie sheet. Use a spoon to coat the top of each pita with the tomato paste. Feel free to season with oregano, pepper, or whatever your heart desires. Sprinkle with some of the grated cheese, but leave enough to put a little more on top.

Chop the bacon into smaller bits and fry over medium heat (I use scissors to easily chop mine) to desired crispy-ness. Drain on paper towels and place on the pizza.
Add the sliced mushrooms and pear pieces, evenly distributing the ingredients both around the pizza and between the two pizzas. Top with some spinach, the remainder of the cheese, the feta crumbles, and a few healthy dashes of crushed red pepper flakes. Drizzle with olive oil and balsamic vinegar (just a little as it goes a long way) and a few cranks of fresh black pepper.
Heat in the oven at 300 degrees for 10 minutes or until shredded cheese is melted and pizza and ingredients are warm throughout.

Dammit Jim, I'm a cook, not a doctor...
Time: 20 minutes
Serves: 2 pizzas
Calories: 477 per pizza

19 October 2010

Simple Treat From The Mid-East

I feel a bit brain dead sometimes and need easy, tasty food that serves many purposes and isn't total garbage. Oh so many times how I've succumbed to the "grab n' go" and ended up later with a tummy ache or belly swollen with too much salt or grease. Last weekend I had some veggies to use up and wanted something fast and light but satisfying. So I made fattoush. How to make Fattoush? Well, according to Wikipedia, "To make fattoush, cooks use seasonal produce, mixing different vegetables and herbs according to taste...The vegetables are cut into relatively large pieces..."

Sounds easy enough.

Perhaps you don't eat a lot of Middle-Eastern cuisine and you aren't familiar with fattoush? It's a vegetable-based salad (sans lettuce) that tastes great over couscous (as pictured above) or inside a pita. It's vegetarian, vegan, dairy, and gluten-free (and probably a whole lot of other things too...). After eating some for my lunch, I took the rest of my fattoush to a Sunday afternoon gathering of ladies, each of whom scooped some up with a pita chip as a nice snack.

Fattoush
--1 large cucumber
--1 large heirloom or beefsteak tomato (or 2 romas)
--1 bell pepper
--fresh parsley, cilantro, or mint (I used cilantro)
--TBSP olive oil
--TBSP lemon juice
--dash of salt and pepper


Truthfully, it's just as easy to make as Wikipedia makes it out to be. First you wash and chop up the cucumber and put it in a decent-sized mixing bowl.
Then you remove the seeds from the pepper, chop it up, and add it to the bowl.
Then rinse and repeat with the tomato, chopping it up and adding it to the bowl.
Mince the fresh herbs and add them to the mix. Pour on the olive oil and lemon juice and stir like crazy to mix the whole thing up. Season with a dash of salt and some freshly cracked black pepper to taste. Enjoy!
Dammit Jim, I'm a cook, not a doctor...
Time: 10 minutes
Serves:1 salad
Calories: Under 300 for the whole thing

14 October 2010

Stuffed Peaches Won't Disappoint

Here's another recipe that came out of my Palisade peach adventure. But this one has a much larger story than just, "Hey, I have some peaches. Cool..."

Eat Denver is an organization of independent restaurateurs in the Denver area. This group takes the idea of being a localvore to a different level--eating local can be about supporting your neighborhood restaurant too. The organization does a few events throughout the year, including something called Harvest Week. During Harvest Week, these chefs create dishes using only locally sourced products. Sort of a think local, eat local, act local, kind of triple threat. One of the dishes that I had the pleasure of eating was at one of my favorite restaurants--Rioja.

Chef Jennifer Jaskinski (Chef Jen to her employees) doesn't need me to sing her praises. Her food has been written up in the likes of GQ, Bon Appetit, and Food & Wine, just to name a few. But that won't stop me from signing her praises. No. Because during Eat Denver's Harvest Week I ate something at Rioja that was so rich, so delicious, so beautiful, that I almost cried. Okay, maybe that's a little dramatic, but damn, was that sucker good. Chef Jen served a grilled peach stuffed with honey scented goat cheese and crispy pork belly, topped with micro-basil. It was absolutely as good as it sounds.

And so, now that I've had a taste, I just can't get enough. But, since Harvest Week only happens one week out of the year, I've had to recreate my own little piece of heaven. Thanks Chef Jen for the blissfully sweet idea! I made these as an hors d'oeuvre for a party, so adjust the recipe depending upon how many hungry faces you need to feed...
Rioja Inspired Stuffed Peaches
--peaches, sliced in half and pitted
--plain goat cheese/chevre
--honey
--balsamic vinegar
--bacon strips, cut in half
--micro greens or broccoli sprouts


After removing the pits from the peach halves, use a spoon to scoop out a small concave bowl in the center of each peach half. Using a new clean spoon, fill each peach bowl with a spoon-full of goat cheese. I made one 4oz. log last for 15 peach halves, so remember that a little goat cheese goes a long way! Place the filled peaches into a baking dish. Drizzle each peach half with a light line of honey and balsamic vinegar.
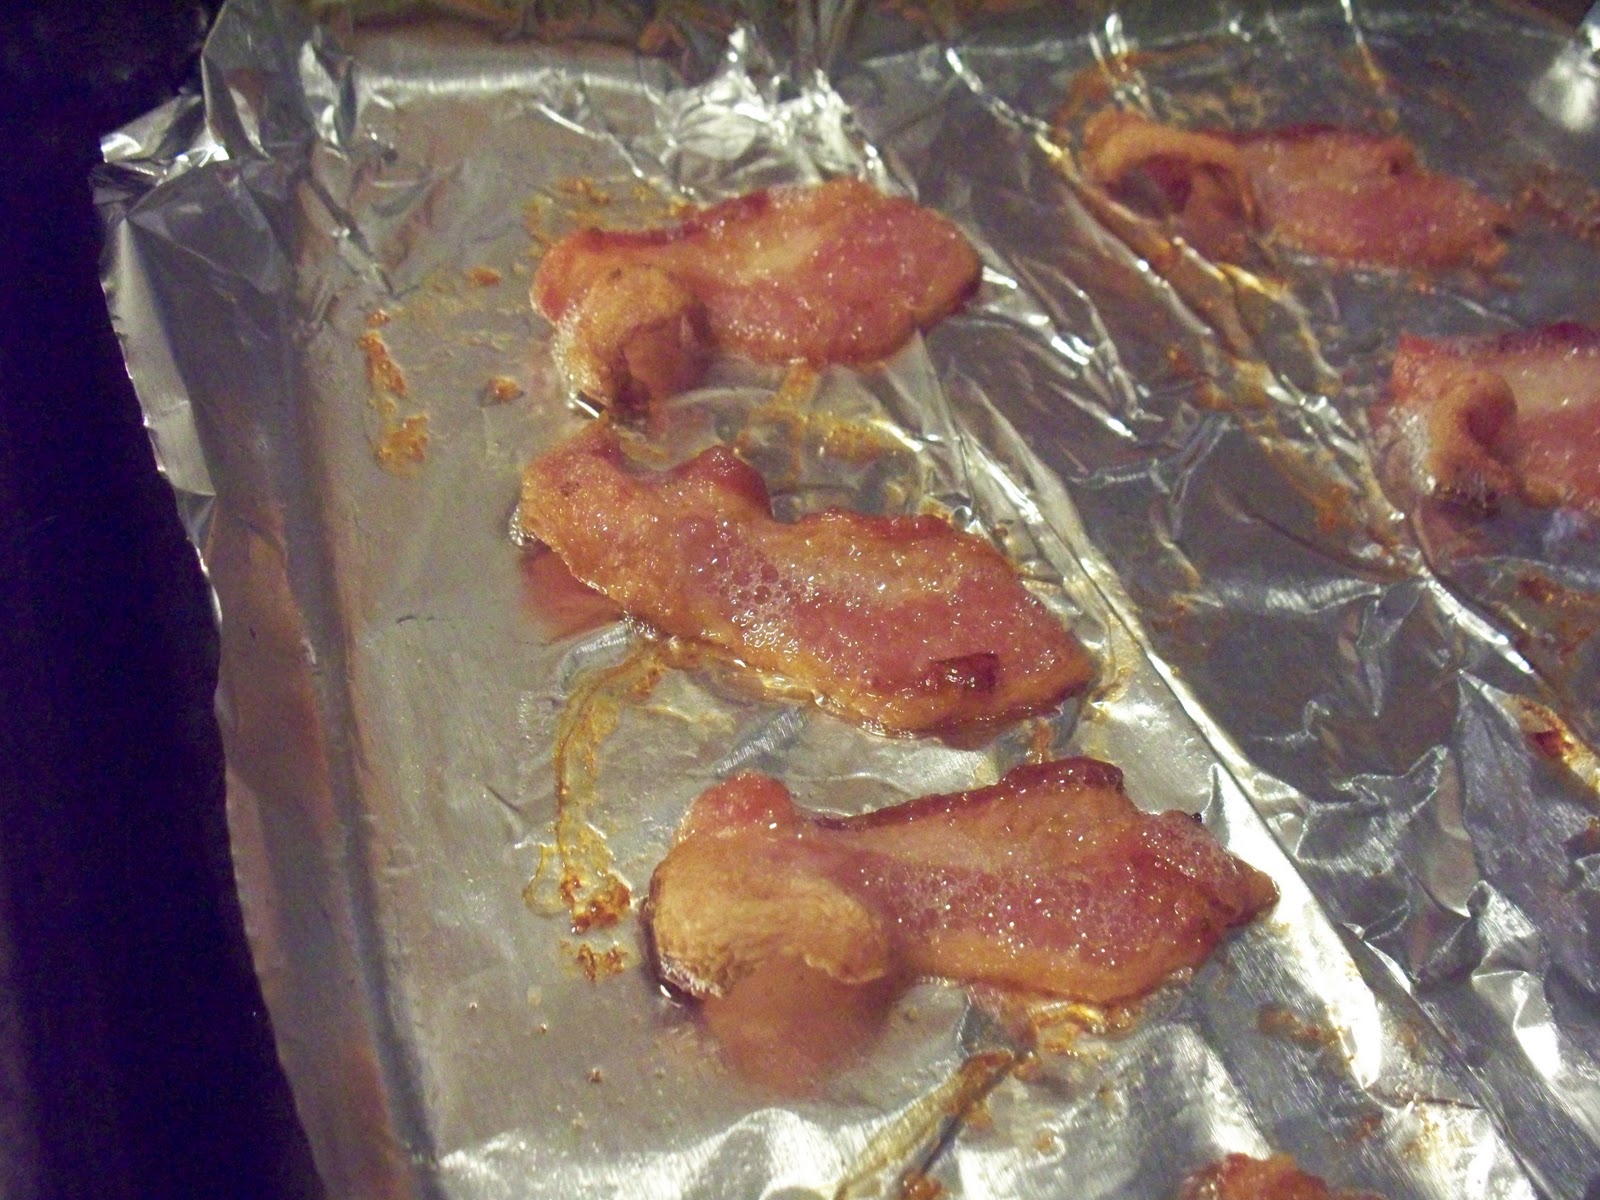
Place the bacon strips on a foil-lined cookie sheet in the oven. Bake at 375 degrees until the bacon is crisp and evenly cooked. The foil will make it easier to pull off the pan. Cooking it in the oven helps keep the bacon from curling up and also allows the fat to drain away.
Bake the peaches in the oven at 375 degrees for 8 minutes. Remove and top each peach with the crispy bacon. Place back into the oven for a few more minutes, until the peaches are softened *but not soggy* and the goat cheese is warmed.
Remove to a plate. Top with the micro greens and serve!
Dammit Jim, I'm a cook, not a doctor...
Time: 20 minutes
Serving: 2 peach halves
Calories: 304

16 August 2010

Goodbye Gut: Third Place Takes the Cake

What any good contest needs is a little competition, and I found that to be especially true of the Goodbye Gut contest. We got more submissions than expected (a good thing) and it took longer than anticipated to cook through all those recipes (also fine by me!). Today's recipe will be the last featured recipe from those contest submissions. It comes from our friend Racheletto, who we told you about back in January when she was doing a project called G.U.L.P which involved eating a very restricted diet and donating her grocery money to charity!

She writes, "I love spinach and I have to admit that I don't really care for pork bacon (call it un-American if you must)." Her recipe, which "I've adapted it from a recipe I found here," she tells, calls for turkey bacon, but I used the real deal in mine (upping the fat content a little, but still keeping the recipe within healthy limits).


Bacon Spinach Cakes
--12 oz fresh baby spinach
--1/2 cup low-fat cottage cheese
--1/4 cup finely shredded parmesan cheese, plus a pinch more for garnish
--2 large eggs, beaten
--4 strips turkey bacon, crispy and chopped
--1 clove garlic, minced
--1/4 teaspoon finely ground black pepper

Equipment:
1. Regular muffin tin ("I've also used single serving size ramekins too with similar results," she says)
2. Food processor


Preparation:
1. Preheat the oven to 400*F.

2. In the food processor, pulse the spinach in three batches until finely chopped. Transfer to a medium bowl. Add cottage cheese, parmesan, bacon, eggs, garlic, and pepper.

3. Coat 9 of the 12 muffin tins (or the ramekins) with cooking spray. Divide the spinach mixture among the 9 cups evenly. They will be very full. [Editor's note: We, um, clearly aren't great at taking direction and filled all 12 of the muffin tins. Oops!]


4. Bake the spinach cakes until set, about 20 minutes (this could be as long as 30 if you use ramekins). Let stand in the pan for 5 minutes. Loosen the edges with a knife and turn out to serve, sprinkled with a bit more parmesan. (Alternatively, you could serve them in the ramekins).

Racheletto guided us to eat these "on top of a toasted English muffin with perhaps a tomato or egg on top, like a benedict! They're luscious and very cheesy, but still good for you too!" Yes ma'am. Definitely something nice and different for breakfast!


Dammit Jim, I'm a cook, not a doctor...
Time: 35 minutes
Serves: 9 spinach cakes
Calories: Turkey bacon, 82 calories per cake; Pork bacon, 113 calories per cake

30 July 2010

Don't Cook? Make Pesto


Oh man, did I have a lot of herbs. And fresh herbs are so delicious and add such depth to any dish, but they can be hard to use up before they wilt and spoil. If you're growing an herb garden at home, kudos to you! That's the best way to enjoy fresh herbs year-round without over committing. But most of my veggies (and herbs too) come straight from the farm and when you're dealing with farmers you kind of get what comes. And I got a lot. A lot of parsley; even more cilantro.

But after making salsa I still had way more cilantro than I knew what to do with. And I didn't want the parsley to feel like it was getting overused since I kept adding it to almost every meal(herbs have feelings to, you know), so I decided to put each to good use by making pesto out of them.

Pesto, God love it, is just about the easiest thing to make. Ever. Some folks might like the little pre-mixed dried packet, but I'm convinced they just don't know what they're missing. If you have fresh herbs and olive oil, in 5 minutes you can have pesto.

Pesto:
--1 cup fresh parsley or cilantro
--3 TBSP olive oil
--1/2 lemon (juice only)
--2 cloves garlic


I'll tell the rest of the recipe as a photoessay of sorts, because there really isn't much of a "recipe" to making pesto...
I made my parsley pesto first, and then my cilantro pesto second. I chopped the stems off so that I just had the leaves (sure there were still some stems in there, but that's okay) and dropped that into the blender/food processor. Could you chop these up by hand? Sure you could, but a blender or food processor is so much easier! I start with one cup of the chopped herbs.
I squeezed in the juice from the half of a lemon and tossed in a few garlic cloves. Then I added the olive oil, and blended it together. Making pesto involves the Goldilocks paradigm: If the pesto is too creamy, add more herbs; if it's too piecey, add more olive oil. You want a texture and consistency that is just right.

I then scraped that into a tupperware and did a quick n' dirty rinse of the food processor before I started over again with the cilantro. Now I got a little creative and beyond adding the lemon, garlic, and olive oil, I also add in a little cumin and some dried chili powder. No one said pesto couldn't have a little kick to it...
Pesto is awesome on french bread as the base for bruschetta. You can make pizza with it. Get creative if you want to. Or don't. I just slather mine on some pita or crackers and mix in some hummus.

Dammit Jim, I'm a cook, not a doctor...
Time: 10 minutes
Makes: 1 cup of each pesto
Calories*: Parsley Pesto 405; Cilantro Pesto 374

*Remember: In this case, the calorie count is for the entire container of pesto based on the measurements above. If you add more herbs the calories change a little, more olive oil and the calories could change a lot if you're heavy handed. But you'll be using this pesto in small amounts. A teaspoon here, a tablespoon there...

27 July 2010

Un-wrap This Appetizer


All right, I've already discussed my obsession with Asian cuisine, but seriously...I think it may actually be a problem. Am I in a rut? A delicious Thai-Chinese-Japanese-Indian inspired rut? It may just be that I have a theme (but I also really love tacos, so that just throws the whole theory out of whack).

These wraps are similar to what you get as an appetizer in restaurants. If you love lettuce wraps there you'll be happy to know just how easy they are to make at home! (And cheaper than $8.95, I would guess). They make a great appetizer if you're having friends over for dinner, though on this particular evening the BF and I ate them as our entire meal!

Lettuce Wraps
--2 oz. (1/3 of a "typical" package) Cellophane noodles (also known as bean threads)
--1 lb. ground turkey or chicken
--garlic, minced
--minced cilantro, as much or as little as you like
--crushed red pepper flakes
--1/4 cup soy sauce (I use the low sodium kind)
--1 hearty spoonful of chili paste
--TBSP or so of sesame oil
--head of Bibb, Butter, or Iceberg lettuce, washed and separated into leaves

Cover the noodles with boiling water. Let them stand for a few minutes until softened. Then drain and rinse them with cool water. Chop the mass into thirds.


Cook the ground meat and garlic in a large skillet over medium heat until salmonella-free.

In a bowl, combine the cilantro, soy, chili paste, and oil. Add the noodles and meat to the mixture and toss well to completely coat.


Spoon mixture onto each lettuce leaf and roll up. Each head of lettuce has 20 or so leaves that are a good size.

Dammit Jim, I'm a cook, not a doctor...
Time: 20 minutes
Serves: 6
Calories: 196 per serving (3 wraps)