Showing posts with label bacon lovers. Show all posts

11 July 2011

Bacon Is Meat Candy When Candied

Do you know what's better than bacon? Candied bacon. Do you know how you candy bacon? You add sugar of course! I mean, okay, I didn't say "Do you know what's better for you than bacon..." did I? No. And with the addition of cream cheese and pastry crust this isn't exactly the healthiest recipe I've ever posted here. So, let's suffice it to say that these are meant to be served/eaten as appetizers. Delicious candied-bacon pâtisserie appetizers!
Candied Bacon Pâtisserie
--4 slices of bacon
--4 TBSP un-packed brown sugar
--1 refrigerated pie crust rolled out into even thickness
--1/4 brick of low fat cream cheese or neufchâtel
--1/4 cup of sun-dried tomatoes


Space the bacon slices on a cookie sheet. Sprinkle each piece with brown sugar and place in the oven at 350 degrees. Cook until bacon is golden brown. Remove to a paper-towel lined plate to drain. Pour excess grease from pan into a jar or container (you never want to pour grease down the drain!).

When the bacon is cool enough to work with, use scissors to cut the bacon slices into 1/2" wide pieces.
Slice the pie crust into 20 squares. Place a pat of cream cheese on each square. Top with 2-3 sun-dried tomatoes and 1 piece of sliced candied bacon. Roll up the crust into a nice little package and place on to a new clean cookie sheet. (You don't want to re-use the bacon cookie sheet without wiping it down really well first. Otherwise the bottoms of your pastries will burn due to any remaining bacon grease on the pan. If you have a second cookie sheet it's usually easier just to use that).

Cook the pâtisseries at 350 degrees for 15 minutes or until golden brown. Allow to cool 5 minutes before serving (else the cheese might burn your mouth!). Unlike revenge, this recipe is a dish best served warm.
Dammit Jim, I'm a cook, not a doctor...
Time: 35 minutes
Serves: 20 pâtisseries
Calories: 93 calories per pâtisserie

01 April 2011

Breakfast of Champions

Do you ever have days where you feel like your get-up-n'-go just got up and went? Today's recipe is a perfect cure for that! Packed with a lot of protein, and aided by sugars, this is sure to add a spring in your step. In fact, I've heard some say it's a good hangover cure. I've not tried it myself, but I'll let you be the judge of that.

The key to a perfect balance of flavors is to carefully choose your bacon--also known as meat candy--wisely. I prefer to use a thick slab that is Applewood-smoked or a nice center-cut style.
 Breakfast of Champions
--5-6 pieces of meat candy
--1 PBR


In a large skillet with deep sides, lay out 5-6 pieces of the meat candy. Turn the stove temperature to medium and start cookin'!

I like to use a splatter screen, pictured below (that the nice people at IKEA made), to prevent any kitchen catastrophes.*
 *This is especially important if you are making this as a hangover cure and might possibly still be drunk.
 When the fat from the meat candy begins to melt off, it's time to turn it over. I find that using tongs for this process allows me to easily turn the candy and lay it out for even cooking.
 When the meat candy is evenly cooked and is golden brown on both sides, remove it from the heat. It is important that you drain the meat candy on paper towels so that it doesn't have a greasy texture and the true flavor shines through.
 Remove to a plate and serve with your PBR (in the can is best for optimum flavor). Enjoy!
Dammit Jim, I'm a cook, not a doctor...
Time: 15 minutes
Serves: 1
Calories: 450 calories

27 February 2011

Sausage + Bacon = Healthy Dish?

I know, you're trying to figure out how it is possible that one could eat sausage and bacon in the same meal and not have a heart attack immediately? Oh my friends, you can absolutely have your (pork flavored?) cake and eat it too! This recipe was inspired by a meal I ate last winter at an Italian café down the street from my office. I know it was a long time ago, but I remember it like it was yesterday (plus I took notes)! That dish contained both Italian sausage and prosciutto, but had a lot more calories and other ingredients (like croutons). So for my at-home recreation I tried to lighten it up where I could, without sacrificing a hearty dish that is both filling and full of flavor.

While the sausage and bacon both have a lot of fat, there is also a lot of protein in the meats as well as the white beans. Eliminating the bread and adding the spinach helps round it out a little more. 
Italian Sausage White Bean Stew
--1 lb. spicy Italian sausage (without casing)
--3 strips bacon
--small onion, diced
--garlic, minced
--15oz. can of white beans (sometimes labeled Cannelini), drained and rinsed
--14.5oz. can of diced tomatoes with juices
--black pepper
--1 cup chicken broth
--1 cup spinach leaves, washed and torn
--parsley
--1/4 cup Parmesan cheese

In a large skillet sauté the Italian sausage, stirring to crumble it as it cooks. Ultimately you want to end up with fully cooked bite-sized sausage pieces.

While the sausage cooks, take your trusty kitchen scissors and cut the bacon strips into small squares directly into a large pot or Dutch oven. Allow the bacon to cook until it begins to crisp but is still soft. Add the onion and garlic to the pot and cook them in the bacon grease, stirring often.
Add the drained white beans and stir to combine before adding the tomatoes, pepper and broth. Bring to a boil and add the spinach to the top. Do not stir to combine, but rather allow the the spinach to cook down for a few minutes before stirring to mix it with the soup.
Spoon into bowls and top with parsley and Parmesan. Serve.
Dammit Jim, I'm a cook, not a doctor...
Time: 35 minutes
Serves: 4
Calories: 508

13 February 2011

Mom Always Said "Eat Your Veggies"

Cauliflower, as it turns out, is amazingly good for you. Like kale, broccoli, and other veggies known as cruciferous, cauliflower contains tons of vitamins, minerals, and fiber. Pregnant? Cauliflower has 15% of recommended daily folate intake and 90% of your vitamin C. Magic! But, again, like other cruciferous veggies, cauliflower can be tricky to eat regularly. My solution? Add bacon of course!

Eating healthy does not have to mean eating boring. To dress up my cauliflower I created a pasta with bacon, curry, tomatoes, and sage for a powerful taste and maximum benefit. Hello Cleveland, we are Maximum Benefit!
Curried Cauliflower Pasta
--8 oz. spaghetti noodles (about 1/2 a box)
--3 slices bacon
--15 fresh sage leaves
--2 cloves garlic, minced
--1 small head of cauliflower, stems and leaves discarded, cut into half-dollar sized florets
--yellow curry powder
--paprika
--black pepper
--1/2 pint cherry tomatoes, sliced in half
--1/2 cup grated Parmesan cheese, divided


Cook the pasta according to package directions. Drain the pasta, reserving 1/2 cup of the pasta water.

While the pasta cooks, in a large skillet, cook the bacon over medium-high heat until crisp. Set aside. Add the whole sage leaves to the skillet and cook in the bacon drippings until leaves are crispy. Set aside with the bacon.
Add the garlic to the pan and cook, stirringly consistently, until garlic is fragrant and begins to brown. Add the cauliflower florets and 1/4 cup of water to the skillet. Cover and let steam for 2 minutes. Uncover and add the curry powder, paprika, and black pepper, tossing to mix well.
Add the tomato halves and cover the skillet again, letting it steam another two minutes. Add the reserved pasta water and 1/4 cup (about an ounce) of shredded Parmesan. Stir so the cheese melts and the sauce begins to get creamy. Add in the pasta and toss to combine. Throw the bacon and sage on top and scoop into bowls.
Top with shredded Parmesan cheese (another 1/4 cup should take care of four bowls) and a fresh crack of black pepper. Serve!
Dammit Jim, I'm a cook, not a doctor...
Time: 25 minutes
Serves: 4
Calories: 403 per serving

06 February 2011

Smoky, Leeky, and of Course, Corny

I love leeks. But unlike their cousins, garlic and onions, I'm never quite sure what to do with leeks. But if I'm eating out and the menu item says "...blah blah leeks..." you bet I'm ordering it! So I decided to do a little experimentation by adding leeks to the corn chowder I was making. If only I was a little more up on my French cuisine... However, experiment's results? Win!

This chowder gets it's smoky flavor (and name) from the bacon, sure. But the real trick to the smoky layered flavors is the blistered bell pepper. If it's old outside (like the subzero temps we've had in the past few weeks) you can use the broiler on your oven to roast peppers, chiles, and the like to beautiful smoky glory. It will add an additional oomph of flavor to any dishes you would be using these babies in (especially chili, soups, and stews!).
Smoky Leek-Corn Chowder
--1 bell pepper, whole
--4 strips bacon
--1 leek stalk, sliced into small rings
--2 ears of fresh corn, niblets sliced off and cobs discarded
--1 10oz. package of frozen corn
--1 1/2 cups vegetable broth or stock
--2 cups heavy whipping cream

Set the oven to broil and place the bell pepper on a baking sheet on the top rack of the oven. Turn the pepper every 3 minutes to ensure even roasting (and not burning!). The pepper is done when it is roasted on all sides and the skin is crackled and easy to peel off. Set it aside to cool. We will not use the oven again in this recipe.

In a pot with deep sides, cook the bacon strips over medium to medium-high heat. When golden brown but not burned, set aside. Add the leeks to the bacon grease in the pot and sauté over medium heat, stirring regularly. When the leeks begin to get tender, add the fresh corn pieces, stirring together to mix. Allow this to cook for two or so minutes so the corn begins to get tender as well.

While the vegetables cook, remove the skin from the pepper. Dice the roasted pepper pieces, removing any stems or seeds as desired. [Note: If you want to add a little more "fire" to the soup, leave some of the seeds in.] Once chopped, add these pepper pieces to the pot and stir to combine before moving on to the next step.
Pour in the frozen corn, broth, and cream. Stir to combine and allow to come to a boil before reducing the temperature and simmering the soup for 40 minutes. Stir occasionally to keep cream from scalding. Serve, topped with the cooked bacon, crumbling one piece atop each bowl like bacon-y croutons. Season with fresh cracked black pepper.

Dammit Jim, I'm a cook, not a doctor...
Time: 1 hour
Serves: 6 bowls
Calories: 307 per bowl

24 January 2011

Mac N' Cheese Minus the Macaroni

Well hello delicious, my but aren't you pretty. It's perfectly okay to talk to your food--especially if it's totally and completely something you shouldn't be eating. Case in point, my recent genius decision to make a mac n' cheese dish. What's so bad about it? Oh honey, it's soooo bad it's good. The good: (A) It is delicious, and, (B) It is made almost entirely of cheese. The bad: (A) It has a bajillion calories, and, (B) It is made almost entirely of cheese (and I think I am allergic to cheese).

When I was eating dairy regularly I was a pretty big fan of cheese and made a mean Lobster Mac N' Cheese that people would ask me to make pretty much whenever we had dinner. Sigh. The good ole days. But a treat every now and again is what makes life worth living, right? So here we are. I was craving something home-y and comforting and there aren't many other comfort foods that come close to beating macaroni and cheese. But I wanted something more pillowy than macaroni so I made my mac sans macaroni and substituted gnocchi. (Note to self: Best decision ever).

Gnocchi "Mac" N' Cheese
--15 oz. package gnocchi
--4 pieces bacon
--2 cups shredded cheese (I used a mixed bag of mild and sharp cheddar mixed with jack cheese to get all kinds of cheese flavors. I also used "2%" or the "Reduced Fat" or whatever it was to make myself feel better)
--splash of milk (half and half or cream will work too)
--black pepper

Cook the gnocchi per the package directions, omitting any salt or oil. Drain and set aside in a large mixing bowl.
While the gnocchi cooks, fry the bacon. Remove from the pan and drain on paper towels.
Mix in 1 3/4 cups of the cheese. The heat from the gnocchi will melt the cheese nicely. Add in a splash of milk (or cream or half and half) to help make the melted cheese into a nice non-stringy sauce.
Add lots of fresh black pepper to the mix and give a few good stirs. Take your cooked bacon and crumble it directly into the bowl. Stir again for a nice mix. You will not need to add salt--there will be plenty from the bacon! Pour the mixture into a small glass baking dish. 
Top with the remaining cheese (and if you're me, add more cracked pepper) and bake, uncovered, for 15 minutes until the cheese on top is fully melted and you have to resist the urge to eat the whole pan of cheesy badness. Eat up and perhaps choke down a salad so you can pretend this isn't completely terrible for you...
Dammit Jim, I'm a cook, not a doctor...
Time: 25 minutes
Serves: 4
Calories: 513 per serving

22 December 2010

Country Christmas Classic: Collards

My mama (a southern belle through and through) changes up our Christmas meal every year. Last year it was lamb, ham the year before that, and this year we will be treated to prime rib (mmm!). But one thing never changes--there will be some seriously southern side dishes.

For many, southern side dishes automatically conjure up something starchy. After all, it ain't a meal south of the Mason-Dixon without biscuits, or rolls, or cornbread, with potatoes both sweet and mashed, or cheese straws, or dressing (what we call stuffing that never saw the inside of a turkey), or macaroni and cheese, or even grits. But we like to "go green" too. We like our beans green, unless they're black eyed peas, and our spinach creamed. But greens--collards or turnips--are a true southern meal staple and will make an appearance at many a Christmas dinner.

Collards and turnips greens have great nutritional value, and like any vegetable that comes in a dark, rich, emerald hue, greens are chock full of vitamins and antioxidants. But in the south, everything tastes better with bacon or fat back, and traditional greens are prepared in such a manner. Greens are often boiled for hours upon hours and seasoned with bacon, fat back, vinegar, or sugar. Here's a little bit lighter way to enjoy your greens that is a little bit nice [healthier] and a little bit naughty [bacon!].
Collards n' Bacon
--2 strips of bacon
--1/2 small onion, diced

--1 bunch of collards
--black pepper


Using your handy kitchen scissors, cut the bacon strips in half length-wise and then cut into small pieces. Fry up these tiny pieces in a medium skillet over medium heat until crispy but not too done. Scoop them from the pan and drain on a paper towel, making sure to leave about 1 TBSP bacon grease in the pan.
Sauté the onion in the bacon grease for several minutes until the onion is translucent. Using those same handy kitchen scissors, cut the collards away from the center stalk so you have two halves of each collard leaf. Cut the leaves into strips directly into the pan. Stir to mix with the onion and reduce the heat to medium-low. Sauté the greens, stirring regularly. The greens will wilt but will also get crisp on the edges. Lower the temperature further if necessary.
Add the bacon pieces back to the mixture and season with some fresh black pepper. (You won't need any salt--the bacon should provide plenty of seasoning!) Once everything is harmoniously mixed up and warm, eat 'em up!
Dammit Jim, I'm a cook, not a doctor...
Time: 15 minutes
Serves: 4
Calories: 75 per serving

22 November 2010

Bon Anniversaire Bacon & Other Bad Habits!

Logo courtesy of Simply Fabulous
Gosh, has it really been a year? And yet, simultaneously, has it only been a year?

It's hard to believe that it was over a year ago when I was making bacon toffee cookie bars in my kitchen and had the epiphany moment. I decided then, fingers covered in dough, house smelling of pork products, that I wanted to write a cookbook. But as a home cook I didn't know the first thing about writing a cookbook. I'm no chef, just some girl who likes to make food things who grew up in a household with people who like to make food things, who descended from a long line of people who like to make food things.

So I decided to write a blog to first whip both my brain and my kitchen into thinking outside of the recipe box. I woke up in the middle of the night with the thought that this all had to happen NOW, bought the URL at 2am and registered both the Blogger and Wordpress user-names. My friend Kathryn, a classically trained chef, was unemployed at the time and offered her partnership services. And thus, Bacon & Other Bad Habits was born.
Photo of Kathryn and Leah courtesy of Kokoro Photography
In the past year many things have changed. I've been trying to get into better shape and so my cooking has taken on a new approach of how to eat healthy but not give up on taste or things I like to eat. I hope I've succeeded in this. I've forced myself to branch out from standards and family favorites and figure out how to cook new ingredients and use new preparations for everyday items. I started getting my vegetables from a farm to help challenge me and introduce me to new produce.

But other things have changed too. Kathryn started teaching at a culinary school and working as a personal chef and had less time to devote to my pet project. As such, she stopped blogging in February. She is also almost eight months pregnant as I write this; a delightful new critter is about to enter her world. I am very proud of my friend and former contributor and happy that her pushing and partnership are why this blog exists to begin with. I'm equally happy that she now has a pet project of her own--a baby!

My own life is on a new adventure as well. I'm slowly moving out of my tiny 400-square-foot dollhouse (take the tour on YouTube and check out my old super awesome asymmetrical haircut. I was so rad.) and into my boyfriend's house. The kitchen is bigger, the lighting is worse. Here's hoping I become a better photographer...

Thanks for reading Bacon & Other Bad Habits. For "liking" it on Facebook. For re-tweeting the tweets. And more importantly, for telling your friends and family about the site. And for cooking the recipes and providing so much excellent feedback about what you want to see more of.

Now, if I only had time to focus on that cookbook...I suppose that's all in due time, all in due time. Happy birthday Bacon & Other Bad Habits, here's to another great year!

xo,
L.
Photo of Leah courtesy of Kokoro Photography

25 October 2010

Pita Pear Pizzas

If we're lucky, we'll still have some delicious pears for a few more weeks. Pears, like grapes, do best in wine country climates like the Pacific Northwest (or the Western Slope in Colorado), where the combination of hot-cold and wet-dry work together to create supple sweet luscious fruits. Beyond being eaten plain--like an apple--pears work well in hearty salads, warmed as a compote, or baked and softened as a side or dessert.


Or, in our case, on a pita bread pizza! When my friend Cha-Cha and I get together it usually means business. But as two busy girls on the go, we were both exhausted from our respective workdays and wanted something healthy and filling to mow down on as we sunk into the couch to become zombies in the warm glow of the television. Cue the pizza idea--and one that works well with kids or adults alike because of the versatility. When making a mini-pizza you can make it anything you want. I of course, had to make ours a little fancy...just like us.

Pear Pita Pizzas
--2 round whole wheat pitas
--2 TBSP tomato paste
--1/4 cup grated cheese (mozzarella or a pizza/Italian blend)
--2 pieces of bacon
--sliced mushrooms
--1 pear, sliced or chopped into chunks
--fresh spinach leaves
--crushed red pepper
--2 TBSP feta crumbles
--balsamic vinegar
--olive oil
--black pepper


Place the pitas on a cookie sheet. Use a spoon to coat the top of each pita with the tomato paste. Feel free to season with oregano, pepper, or whatever your heart desires. Sprinkle with some of the grated cheese, but leave enough to put a little more on top.

Chop the bacon into smaller bits and fry over medium heat (I use scissors to easily chop mine) to desired crispy-ness. Drain on paper towels and place on the pizza.
Add the sliced mushrooms and pear pieces, evenly distributing the ingredients both around the pizza and between the two pizzas. Top with some spinach, the remainder of the cheese, the feta crumbles, and a few healthy dashes of crushed red pepper flakes. Drizzle with olive oil and balsamic vinegar (just a little as it goes a long way) and a few cranks of fresh black pepper.
Heat in the oven at 300 degrees for 10 minutes or until shredded cheese is melted and pizza and ingredients are warm throughout.

Dammit Jim, I'm a cook, not a doctor...
Time: 20 minutes
Serves: 2 pizzas
Calories: 477 per pizza

14 October 2010

Stuffed Peaches Won't Disappoint

Here's another recipe that came out of my Palisade peach adventure. But this one has a much larger story than just, "Hey, I have some peaches. Cool..."

Eat Denver is an organization of independent restaurateurs in the Denver area. This group takes the idea of being a localvore to a different level--eating local can be about supporting your neighborhood restaurant too. The organization does a few events throughout the year, including something called Harvest Week. During Harvest Week, these chefs create dishes using only locally sourced products. Sort of a think local, eat local, act local, kind of triple threat. One of the dishes that I had the pleasure of eating was at one of my favorite restaurants--Rioja.

Chef Jennifer Jaskinski (Chef Jen to her employees) doesn't need me to sing her praises. Her food has been written up in the likes of GQ, Bon Appetit, and Food & Wine, just to name a few. But that won't stop me from signing her praises. No. Because during Eat Denver's Harvest Week I ate something at Rioja that was so rich, so delicious, so beautiful, that I almost cried. Okay, maybe that's a little dramatic, but damn, was that sucker good. Chef Jen served a grilled peach stuffed with honey scented goat cheese and crispy pork belly, topped with micro-basil. It was absolutely as good as it sounds.

And so, now that I've had a taste, I just can't get enough. But, since Harvest Week only happens one week out of the year, I've had to recreate my own little piece of heaven. Thanks Chef Jen for the blissfully sweet idea! I made these as an hors d'oeuvre for a party, so adjust the recipe depending upon how many hungry faces you need to feed...
Rioja Inspired Stuffed Peaches
--peaches, sliced in half and pitted
--plain goat cheese/chevre
--honey
--balsamic vinegar
--bacon strips, cut in half
--micro greens or broccoli sprouts


After removing the pits from the peach halves, use a spoon to scoop out a small concave bowl in the center of each peach half. Using a new clean spoon, fill each peach bowl with a spoon-full of goat cheese. I made one 4oz. log last for 15 peach halves, so remember that a little goat cheese goes a long way! Place the filled peaches into a baking dish. Drizzle each peach half with a light line of honey and balsamic vinegar.
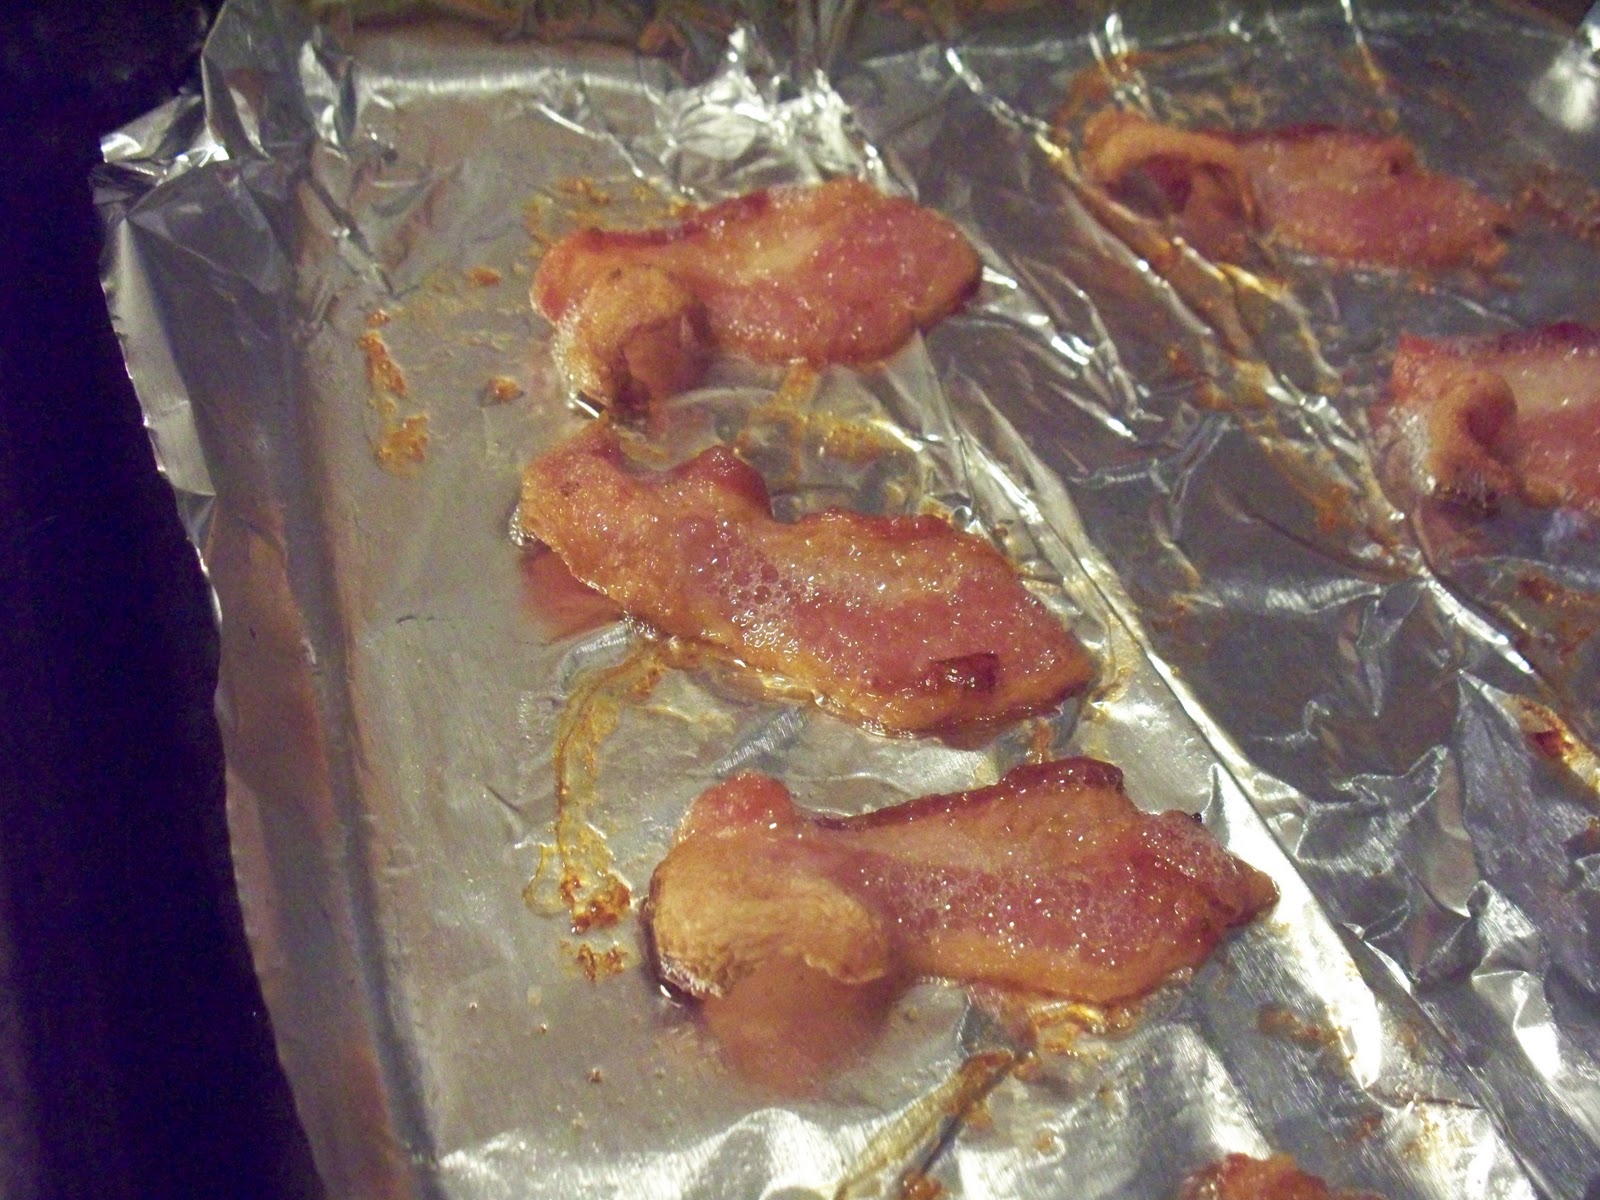
Place the bacon strips on a foil-lined cookie sheet in the oven. Bake at 375 degrees until the bacon is crisp and evenly cooked. The foil will make it easier to pull off the pan. Cooking it in the oven helps keep the bacon from curling up and also allows the fat to drain away.
Bake the peaches in the oven at 375 degrees for 8 minutes. Remove and top each peach with the crispy bacon. Place back into the oven for a few more minutes, until the peaches are softened *but not soggy* and the goat cheese is warmed.
Remove to a plate. Top with the micro greens and serve!
Dammit Jim, I'm a cook, not a doctor...
Time: 20 minutes
Serving: 2 peach halves
Calories: 304